I've again started building banjos on my new Shapeoko 5 Pro CNC
I'm planning to write this up properly when I get time and get the banjo(s) finished
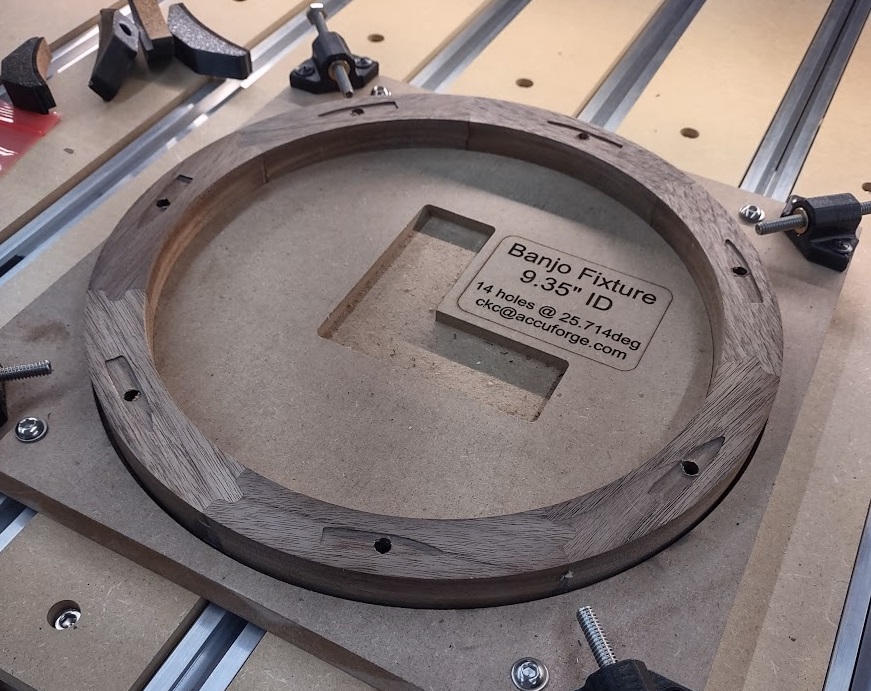
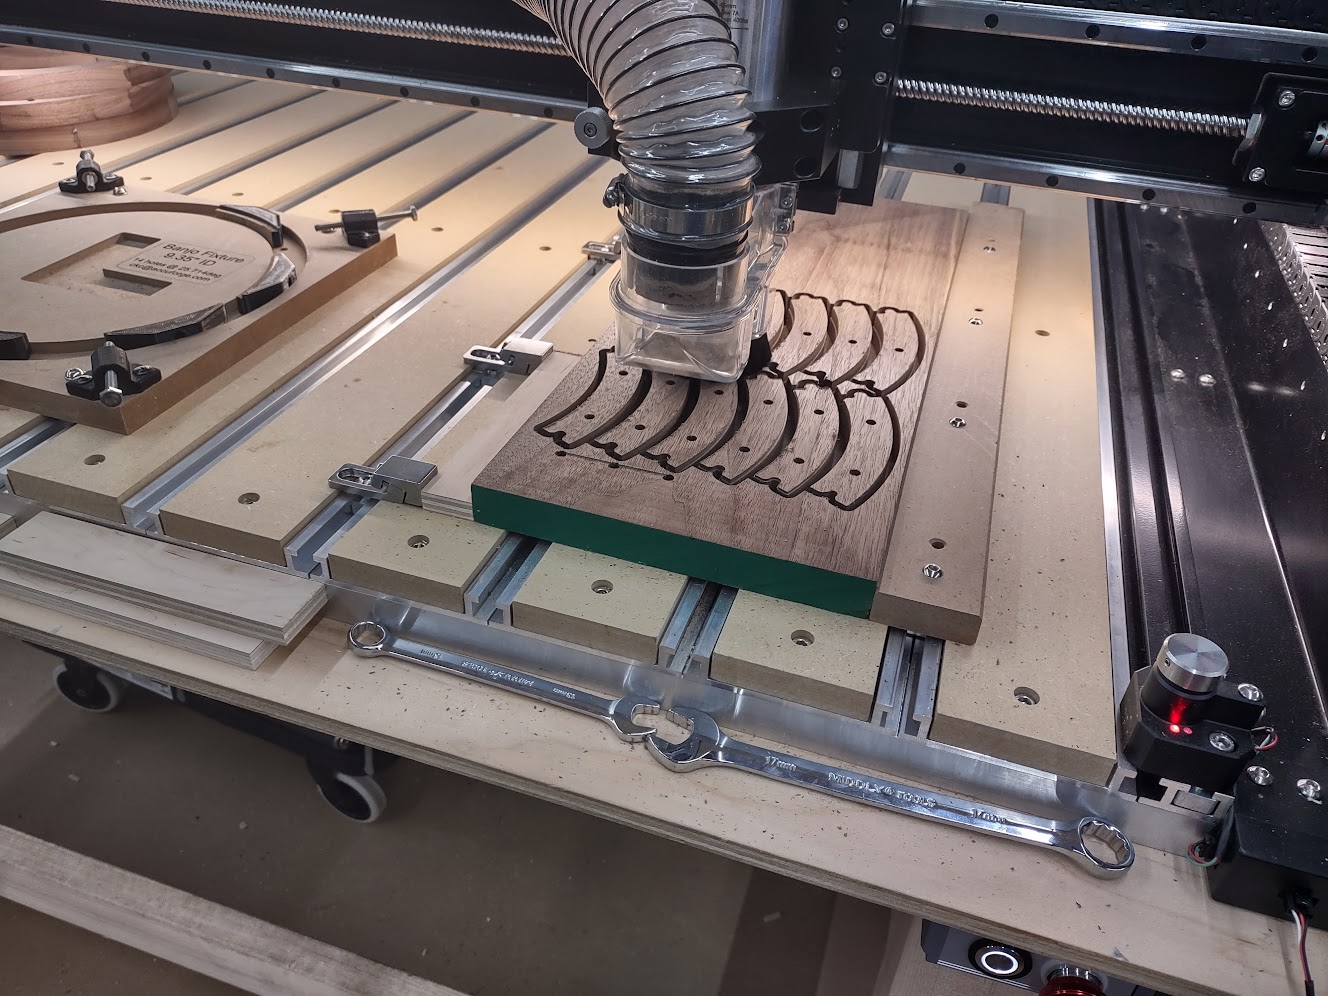
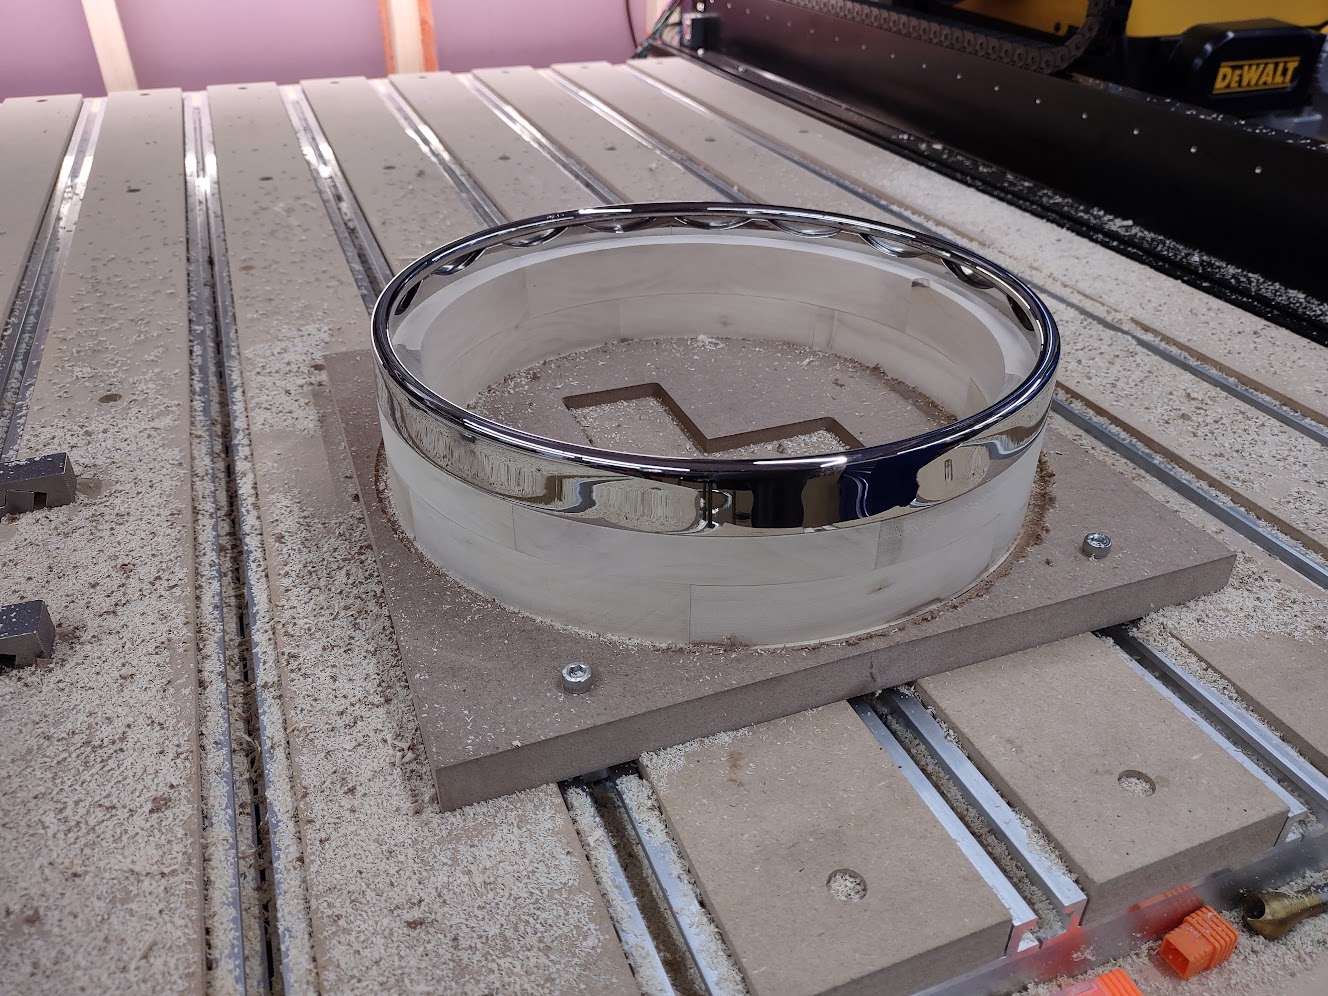
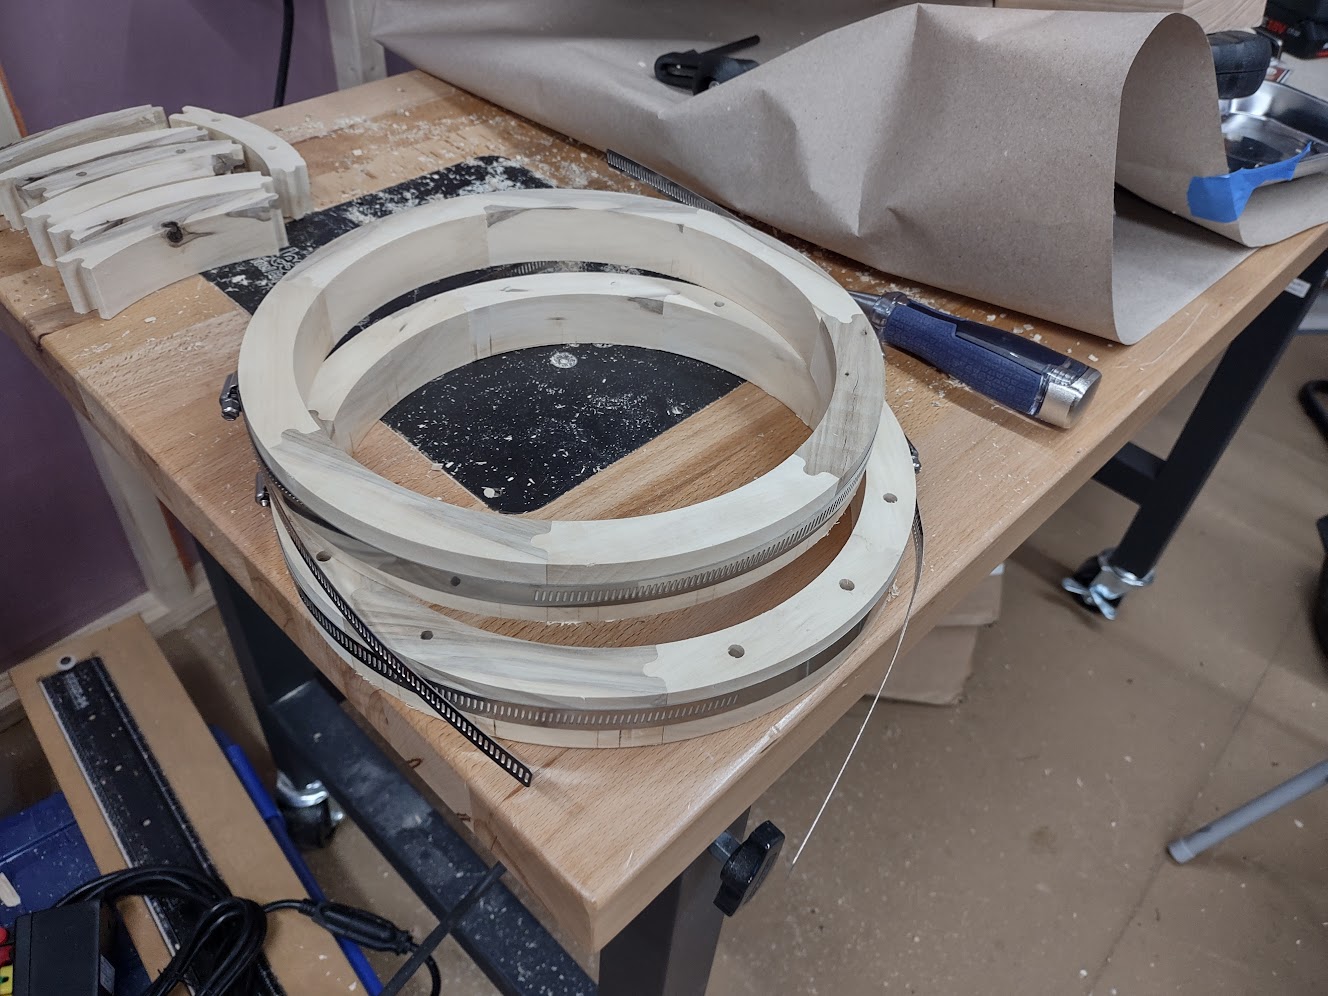
For now, here are some photos of the build. The rim has 7 segments per layer with dowel holes to connect and align them for gluing. This design provides MUCH mroe glue surface between the segments and allows for precise alignments using only a hose-clamp during glue-up. I started out going for a persimmon rim due to the hardness of persimmon wood and that I had some on-hand. I ended up putting that on the backburner since I decided that I don't like the look of it -- kinda splotchy. I ended up re-making the rim from walnut.
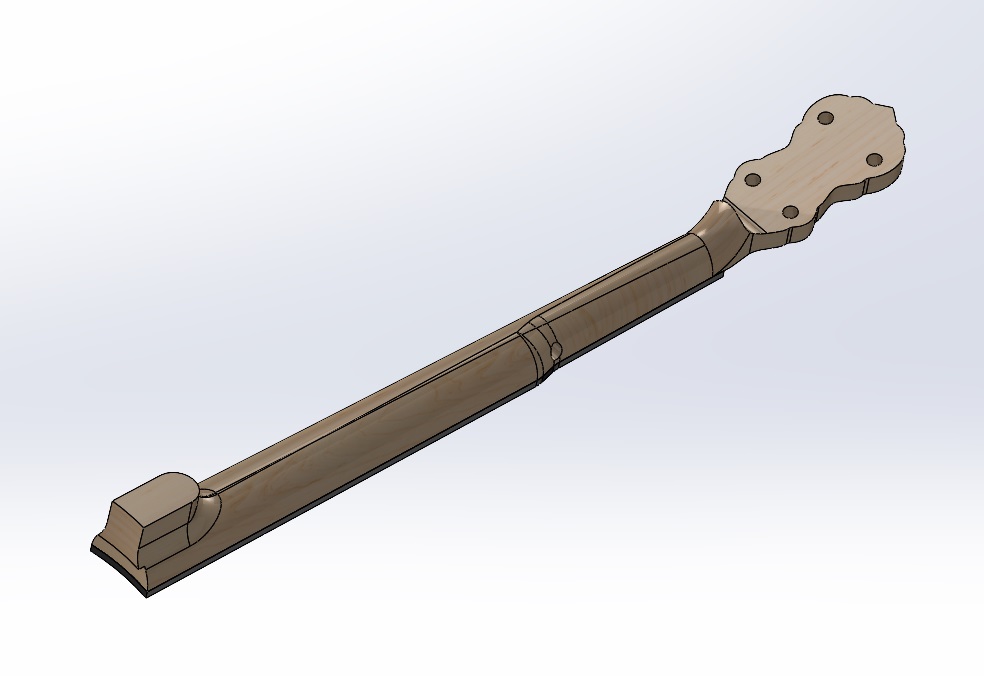
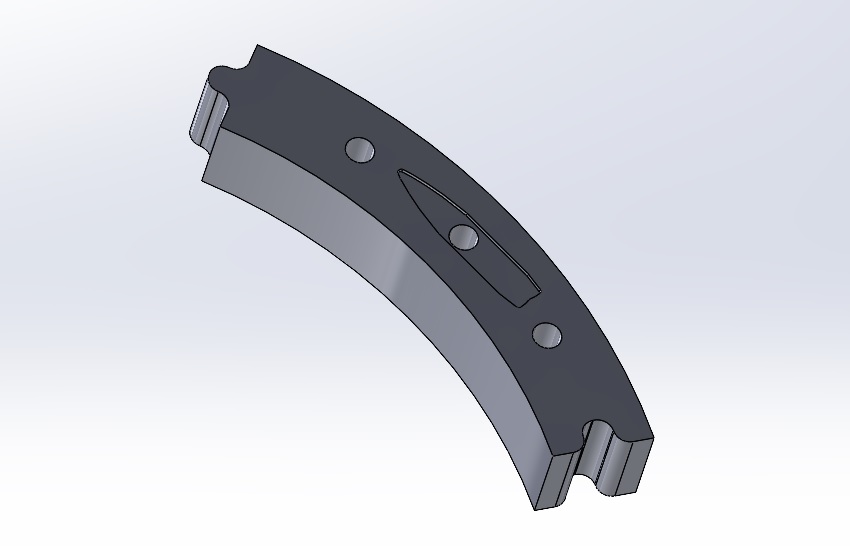
Here are the CAD files (solidworks and STL) for the rim segments and banjo neck
These files were created from scratch by me in Solidworks. You may use them for any purpose provided that you credit me and provide a link to this page in any published works or items that are sold based on these designs.
This is the bottom segment of the rim and has bullet inlay on it. I'm planning to use copper mica epoxy for the inlay. This is the profile of a 212 grain .300 winchester magnum bullet. I'm going to call this my "long range" banjo after the long range shooting events that we do.
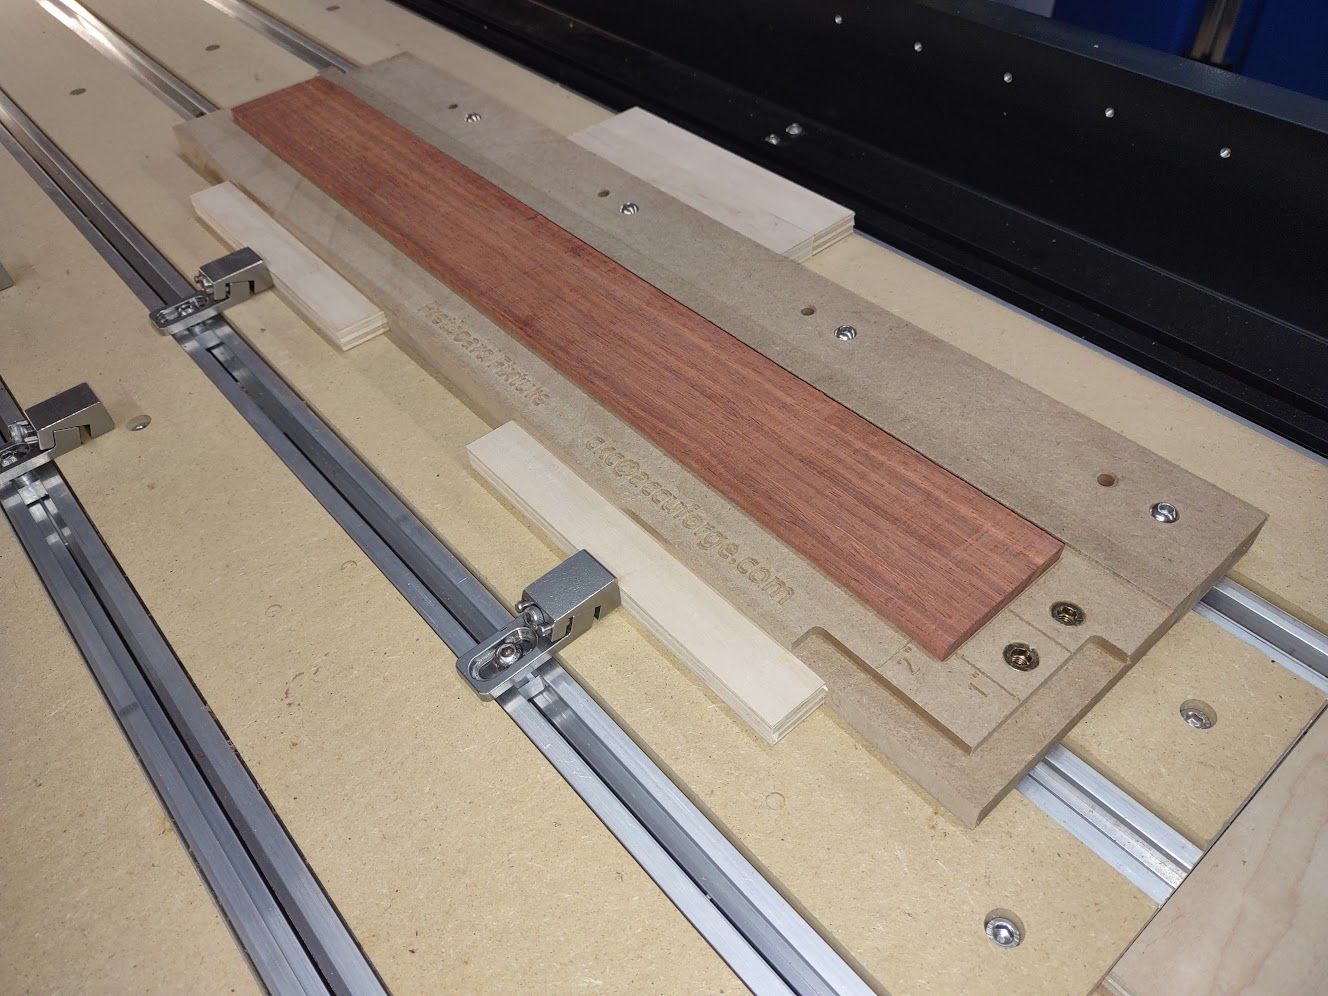
I'm planning to use this fixture to cut the fretboard
I'm able to stack the rim segments more efficiently than cutting pie-shaped wedges to glue together
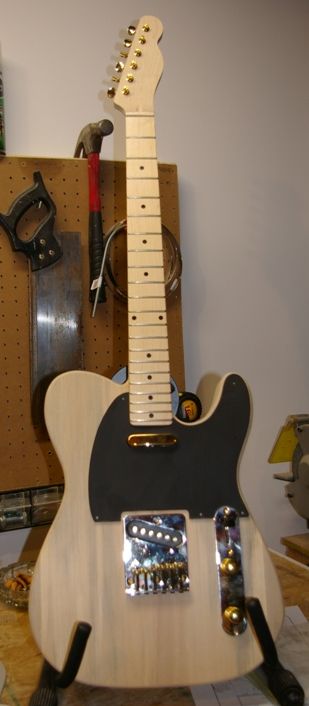
Gary Scott's Tele Build
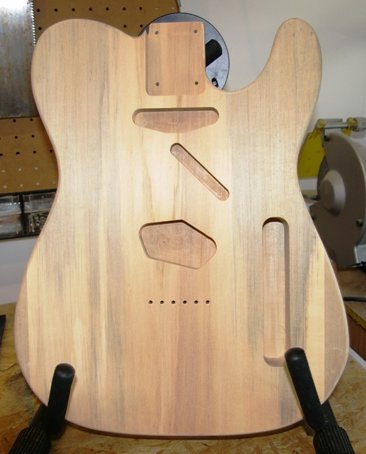
Here is the Tele that Gary built using the drawings on this page. It looks like he did an excellent build.
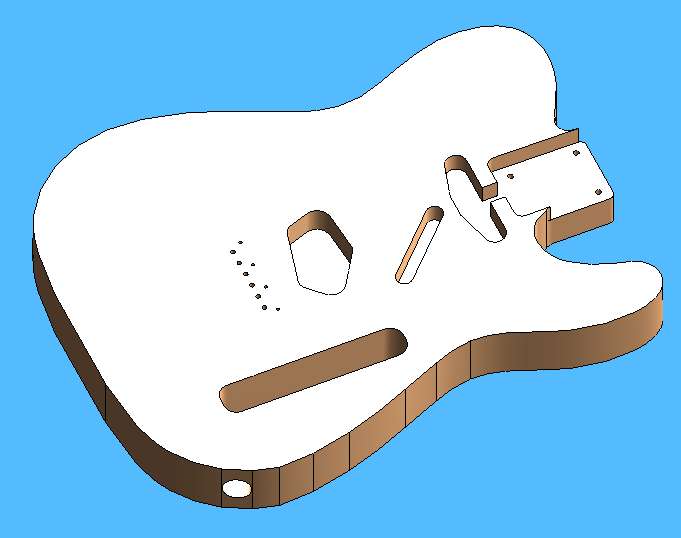
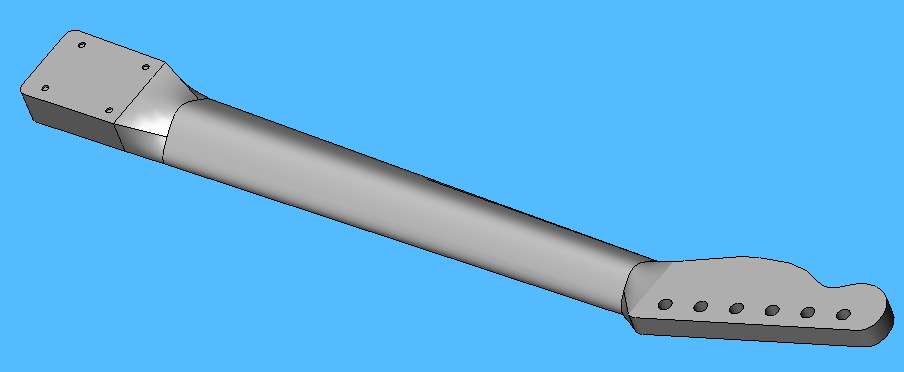
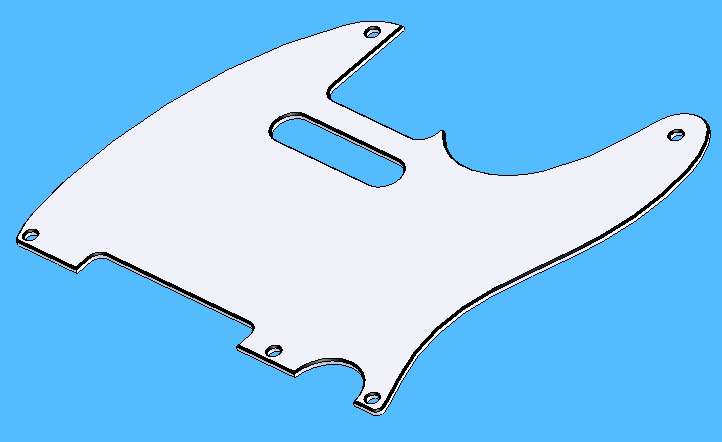
Tele Style Guitar CAD Drawings
Here are some CAD drawings that I made of a Tele Style guitar. These parts should interchange with a Tele since the neck
pocket, pickups, and control cutouts are the same but some of the cosmetic dimensions are slightly different from the original.
The neck has a modified "V" profile.
I saw an ad on the Baltimore craigslist and decided to give it a try and was very glad that I did. I took the Advanced
class that covered "all the how-to's regarding how to deal with fretbuzz, fretting, refrets, leveling etc for electric guitar,
acoustic guitar and bass."
Fret Buzz: Causes and Solutions
Fret Dressing and Leveling
Fret Crowning and Re-Crowning
Fret Wire: Different Types and Uses
How to Complete a Partial Refret
How to Complete a Full Refret
The Luthier / Owner Tony Leicht was great and showed the "real way" to do many of these tasks without buying $$$'s of tools from specialty Luthier suppliers. I would highly recommend his classes to anyone interested in guitar repair / building.
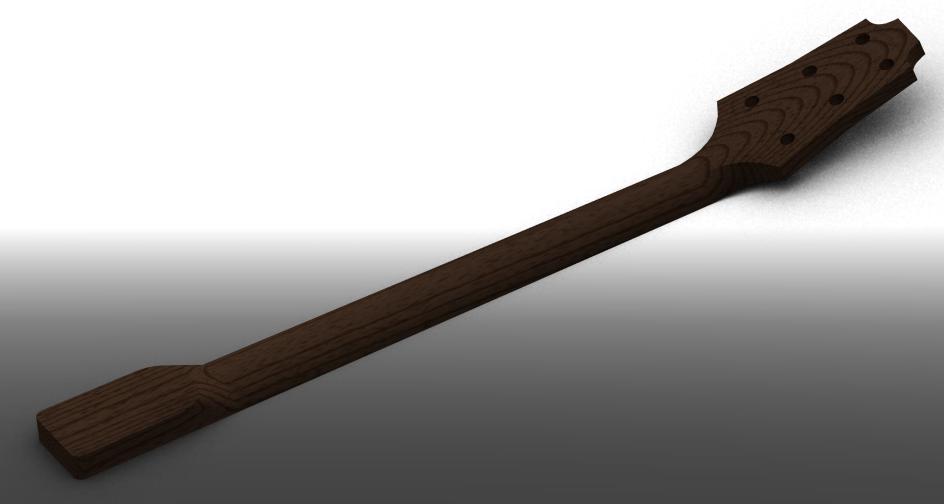
After searching for a while for a ready-to-machine neck for a Tele, I ran across some posts from cyborgcnc in the
CNCzone forums about the subject. Cyborgcnc has created a set of videos for CNC Design and Machining of guitar necks and bodies. At first I tried to do this on my own but it was taking a lot longer that I had planned and I still hadn't come up with a buildable neck. Although I was a bit skeptical about he cost/benefits, I decided to purchase the CNC Guitar Neck Design and CNC Guitar Neck Machining videos.
My payment was acknowledged almost immediately and I received the videos within a few days. The videos show the author designing a neck in Solidworks and creating the toolpaths in Mastercam. Every step is shown along with the author talking about the source for each measurement used and the reasons for each step. Throughout the videos, he discusses not only how to operate the software but how he comes up with design ideas, where to buy parts, and how to realize the design in wood. Basically, these videos showed exactly how to do what I want. They have saved me many hours of wading through Solidworks and Mastercam tutorials and figuring this out on my own. These videos are great -- I can't say enough good things about them.
It's obvious that a lot of time was put into these videos and they are definitely worth purchasing if you want to learn how to do CNC Design and Machining of guitar necks and bodies. Since the neck design videos were so good, I ordered the body design and machining videos as well.
CNC Tele Build
After starting a new CNC machine build with Harford Hackerspace (http://www.harfordhackerspace.org), I began looking for something cool that we
could easily build after we get the new machine completed. A Telecaster (tm) style guitar seemed to be a pretty straightforward project that could
be done in a weekend.
Unfortunately, I couldn't find a good 3D or 2D model of a basic design without paying a significant fee so I have begun coming up with a
design that can be built on a small DIY CNC router. The design will use standard off-the-shelf parts (electronics, pick guard, control plate,
pickups, etc.) and can use a standard Tele style neck (pocket is the same size).
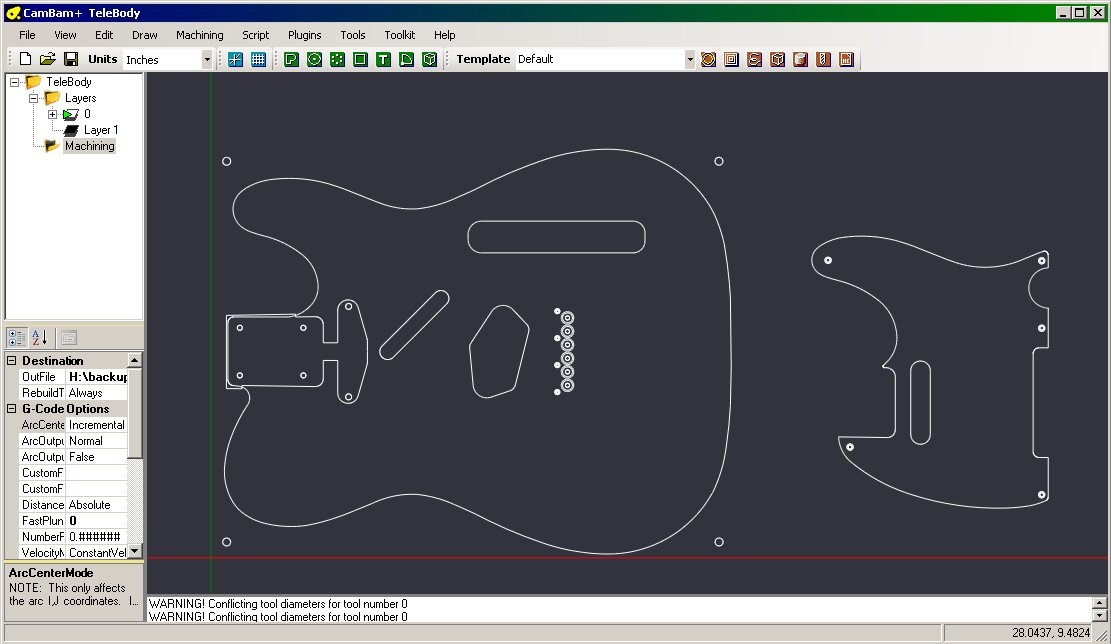
So far I have the body modeled using CamBam with registration holes so that no difficult alignment needs to be done when flipping the body
from the back to the front.
Here is a screenshot of the body
Here are the CamBam and DXF files for the body (what I have so far). I will be adding
the machining operations to the CamBam file and will post the g-code and instructions to build as I complete them.
The current routing plan is:
Step 1. Mount blank (16"x13"x1.75" with back up) on the router, drill registration holes (.25 drill) through the blank and into a sacrificial
board mounted to the table.
Step 3. Insert dowels into .25" registration holes and flip blank to front side. The dowels will line up with the holes in the sacrificial board.
Step 4. Drill neck mounting holes and shallow holes for bridge mount(.125 drill)
Step 5. Route neck, pickup, and control pockets (.25 spiral router)
Step 6. Use screws to mount body to sacrifical board through neck holes and string holes. This is needed to the body doesn't move while routing
the outer profile.
Step 7. Route the outer profile (.25" spiral router)
Experimental Banjo Bridge
This is a 3D animation of experimental banjo bridge design 2. This is a joint design by Steve Myers and myself. Steve has dubbed it the "CockruMyers Bridge".
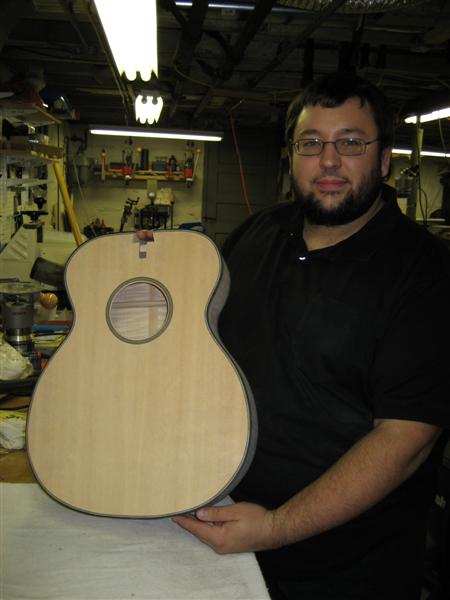
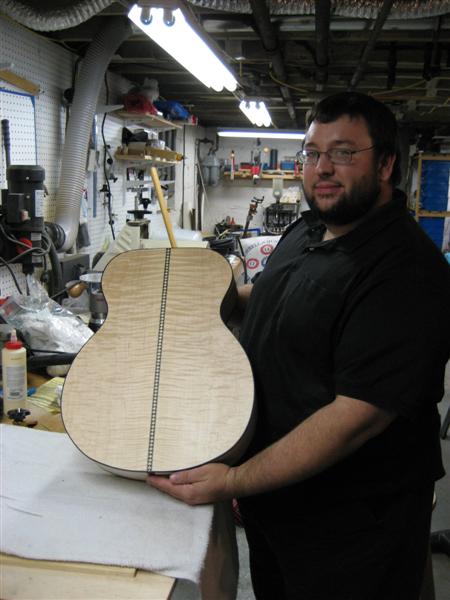
My first Acoustic Guitar Build
This is the first acoustic guitar that I built. I built it when I had just started to play guitar. I was inspired by the
Lynn Dudenbostel episode of Handmade Music on DIY so I bought
"
Build Your Own Acoustic Guitar" by Kinkead and used the plans in the book. The biggest mistake that I made was not using a 2-way truss rod.
The neck developed a bit of a back bow that is difficult to correct. I have the front and back completed and have the sides bent for #2. It is a
dreadnought sized with a sitka spruce top and Brazilian Rosewood back and sides. This is
Dalbergia Spruceana and not Dalbergia Nigra -- I'm not sure that I can tell the difference but it's a lot cheaper and is not CITES restricted.
Experimental Banjo Bridge 1
Here is a video of my CNC router cutting experimental banjo bridge 1.
This is a 3D animation ofexperimental banjo bridge design 1.
This is a 3D animation of the stress analysis of experimental banjo bridgedesign 1.
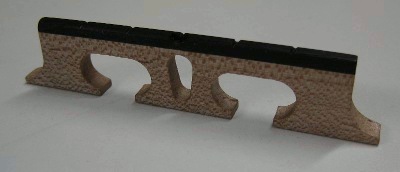
Here is a photo of experimental design 1 cut with my CNC router. This one was made for
Steve Myers
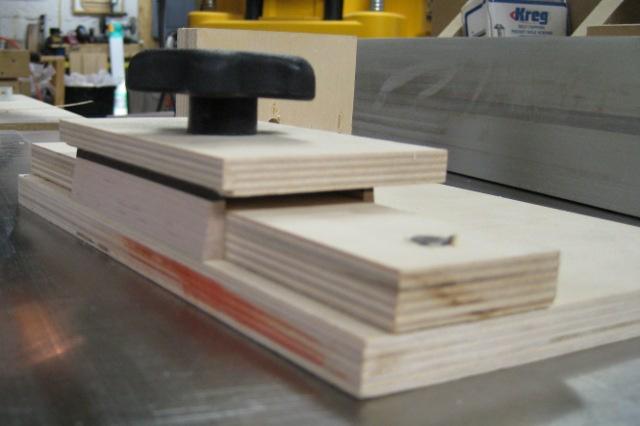
This is the jig that I use to cut the bridge blank to size with the table saw and to cut the taper.
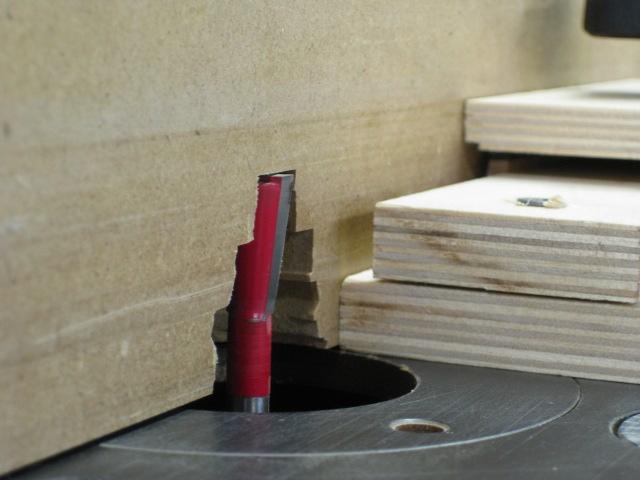
This is an 8.5 degree 5/8" dovetail bit in the router table that is used in conjunction with the jig to cut the taper.
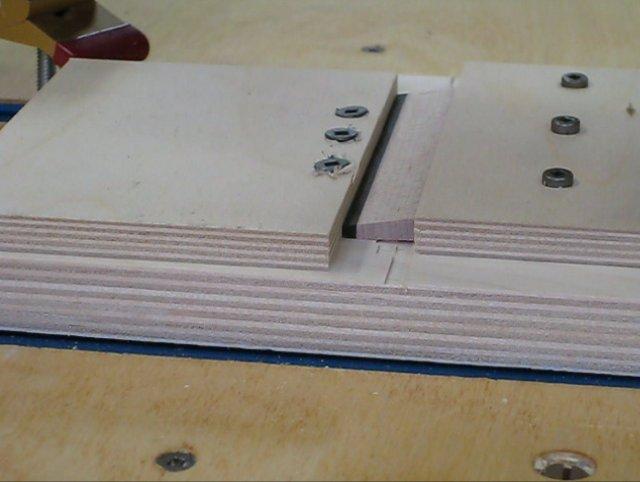
Here is the resulting bridge blank held in a fixture ready to be CNC routed.